


Swedish Cinnamon Twists - Another Favorite Mastered (well, sort of)
- Catrina White
- Jan 20, 2020
- 8 min read
Updated: Jun 5, 2020
It has been some time since I've added to the blog, but a day off is the perfect day to teach Grant to make something using yeast. Since he was little, I've been making something called Swedish Cinnamon Twists, and they are a favorite of his. When I make them, it is imperative I save some right away or he will eat them all up! This is so funny, because he has so much self-control (usually) but not when it comes to a few of the things I bake. Everything else he could take it or leave it and he usually chooses leave it! (Even my Chocolate Chip Cookies - which I'm going to insist he learns how to make!)

We are still on the college acceptance (and denial) journey. He finished all his essays, applications, and testing and now we are in the waiting period. As acceptances have come in, I've been less stressed (he's been fine!), but this weekend we got the dreaded denial to "that" school and now it looks like he will most likely be going farther away to school than I hoped. Much farther. (sad face) We'll see how it all shakes out, but currently he is thinking out west where he was accepted. There I said it. And I didn't even cry! (Don't ask me about yesterday) LOL
I'm going to get my head wrapped around the coming changes, but first I'm going to focus on the seven months I still have him home. Doing things we enjoy together, like watching football, talking, and cooking for this blog are going to be my focus. I know, football is ending soon. No worries, we always find something fun to do together.

So today, we made Swedish Cinnamon Twists! They seem complicated, but they are really not hard to make and they are so delicious! The dough is VERY light and they seem to melt in your mouth when you taste them. They are lighter than traditional cinnamon rolls, and frankly, more fun to eat! Although who doesn't love a good cinnamon roll?

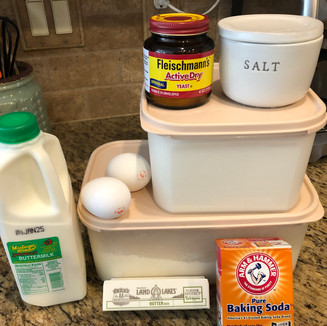


We started by setting out all of the ingredients we needed. Since we are making a dough with slightly warm ingredients, I placed the eggs in a bowl of warm water just to take the chill off of them. I do this when I'm making something that might be affected by a cold egg. It's easy and I don't have to leave the eggs out for a very long to warm up.
Using yeast can be intimidating and it may seem overwhelming, but learning a few tips working with yeast can make it so much more accessible. Temperature, for one, is a biggie! I always thought you had to have the perfect temperature when using yeast, but really the key is not using too hot of a temperature! Too cool is better than too hot. The excess heat will actually kill the yeast, and your dough won't rise. I've heard people say that the temperature of the liquid should be about what a baby bottle should be, but how was Grant going to know that?? So, we simply used a thermometer to help us keep to the right temperature. I think it is important to learn what it should feel like and then let memory guide you. I explained that the more he gets used to the "feel of the right temperature," he won't need to use a thermometer anymore (I rarely do).
Another tip for working with yeast is to add a pinch of sugar to the dissolved yeast. It provides "food" for the yeast and helps it grow. I've also recently learned that adding salt too soon can kill the yeast so I try to be sure other ingredients are mixed in first before adding the salt alone to the yeast. I still have so much to learn!


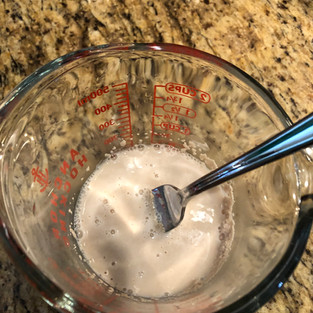
Once Grant had the temperature of the water handled, he added the yeast and a pinch of sugar. He stirred it together with a fork and left it to begin its work. Then we moved onto heating the buttermilk. The temperature for the buttermilk is the same as the water we had needed, but we used the stovetop to warm the buttermilk. One thing you should know is that buttermilk will split when warmed! It actually looks curdled, but this is really okay and expected when you make this recipe. We used the thermometer again, and realized we over heated the milk so we just set it aside to cool. No biggie. If there is one thing I can teach him in cooking/baking, it is that nothing is a real disaster!


While we waited for the buttermilk to cool, he started adding other ingredients to the bowl. He added one stick of softened butter, 6 tablespoons of sugar, and then he was SUPPOSED to add 2 teaspoons of salt. Luckily I saw his "measuring" for the second teaspoon and it was way more than one teaspoon! He just dumped it right in!
Remember when I said earlier that nothing is a disaster? Maybe I was wrong!
If you could have seen the look on his face when I took the bowl and dumped out the sugar/salt mixture and said "let's try that again," you would have laughed. He was NOT impressed! He said he prefers cooking where he doesn't have to be so careful. I understand that, and yet we were not going to make this recipe with too much salt!


Once he remeasured those ingredients, he added the eggs and baking soda. I was impressed he remembered how to use the flap to get the right amount! He also added in the cooled buttermilk and two cups of flour. Then he added in the dissolved yeast. We mixed it up slightly and added one more cup of flour.


Then using the KitchenAid, he mixed it for a couple of minutes at a medium speed. After that, we changed out the paddle for the hook and added in three more cups of flour. Using the dough hook and a speed of 2, he continued adding flour in a bit at a time as needed for sticking.


Once the dough was soft and kneaded, I told him I wanted him to see how to knead without a machine. So we put the dough on the counter and I showed him how to push it away, fold it toward you and turn it, repeat! Over and over and over. I don't think he really wanted to get his hands in it, but he did try it. I told him making bread is a great thing to do when you are upset! You just knead that dough and get your aggression out! He asked me if I was going to put that in the blog....YEP! It's important and TRUE!


After our kneading exercise, he put the dough in the buttered bowl he had prepared by rubbing a couple of teaspoons or so of butter around using a paper towel. This helps the dough to not stick to the bowl as it rises. We covered it with a wet light tea towel (we squeezed it out after wetting it) and placed the dough in our warming drawer. You don't need a warming drawer, just a warm, draft free place to place the bowl.
After 1 hour and 20 minutes, we took the dough out and dumped it onto a floured surface. Grant melted 1/4 cup of butter in the microwave and mixed up a mixture of brown sugar and cinnamon. He loves cinnamon, so he used double the amount in the recipe. This won't affect anything except taste, so go for it!


He made sure the dough was patted to a long rectangle, and spread the melted butter over all of it. Then he placed the cinnamon brown sugar mixture on half of the dough. He carefully folded over the top half of the dough and then sealed the edges by pressing down all along the outer edge of the dough.


I have found the easiest way to cut dough is to use a pizza cutter! I had Grant cut the dough in the middle, and then in the middles of both sides (making quarters). Then he had to decide how many to cut in between. He made them about an inch thick, and after cutting them, he made sure the pans were ready for them. We made sure the pans were spread with butter to prevent sticking.


Then came the fun part! The Twist of the Swedish Cinnamon Twist! Grant took both ends of the dough, and twisted them a few times before placing onto the pan. As he did more and more, it seemed easier for him. He had a few leftover pieces and decided to experiment with them, rolling a couple into rolls and sprinkling extra brown sugar and cinnamon onto them.


We let them rise for about 25 more minutes and then placed them in a 325 degree oven. He was very concerned about using hot pads to put them in (I have no idea why. The pans were not hot yet!). As they were baking, the house started to smell SO GOOD!

I made up a quick frosting for them as Grant would not since he said he didn't want frosting on them, but I knew that others in the house would like some. I mixed about 1 cup of confectioner's sugar with 1 tablespoon of melted butter. I added about 1/4 teaspoon of vanilla and enough half and half to get the consistency I wanted - not too soft, but not like cake frosting. I probably used about 1 1/2 tablespoons of half and half.


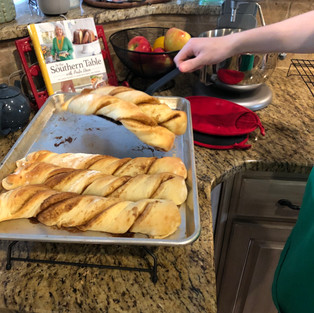


After about 12 minutes, they were ready!! Grant took them out of the oven and placed them onto cooling racks. If he hadn't removed them, they would have stuck to the pans. It's important to remove them while they are hot. Can I just tell you? They are SO DELICIOUS! I encourage you to give them a try! You won't be disappointed!
Swedish Cinnamon Twists (adapted from Taste of Home recipe)
Dough:
2 packages of active dry yeast
1/2 cup warm water (110-115 degrees)
2 cups of buttermilk (110 - 115 degrees)
1/2 cup butter, softened
2 eggs
6 TBSP sugar
2 tsp salt
1/2 tsp. baking soda
7-1/2 cups of all-purpose flour
Filling:
1/4 cup melted butter
1 cup packed brown sugar
1 tsp. ground cinnamon (we used 2 1/2 tsp.)
Frosting:
1 cup confectioners sugar
1 TBSP butter, melted
1/4 tsp. vanilla
1-2 TBSP half and half
To make the dough, dissolve the yeast in the warm water. Add a pinch of sugar to the mixture. Set aside. Warm the buttermilk and then add buttermilk, butter, sugar, salt, eggs, baking soda and 2 cups of the flour to the mixing bowl. Mix together. Add yeast mixture and another cup of flour. Mix well for a couple of minutes. If using a KitchenAid, switch to the bread hook and add 3 more cups of flour. On speed 2, mix, occasionally scraping the side and adding in 1 - 1 1/2 more cups of flour, until soft dough is formed and elastic. Place in a buttered bowl, cover with damp towel, and let rise for 1 - 1/2 hours. Punch down dough and pat into a rectangular shape on a floured surface. Spread melted butter over and then sprinkle with a mixture of brown sugar and cinnamon - placing mixture on one half of the dough. Fold over top section of the dough and seal edges. Cut into strips and twist each strip before placing on a buttered cookie sheet. Let rise 30 minutes and bake in 375 degree oven for 12 minutes. Remove from pans while hot and place on cooling racks. If desired, mix ingredients for frosting and spread over warm twists.


Comments